ImageMagick Watermark Tool: Batch Protect Your Image Copyright
This is a powerful application based on ImageMagick, specifically designed for adding copyright information or logos to images. Whether adding a line of text declaration or stamping an icon as an image watermark, it can handle flexibly and supports batch processing.
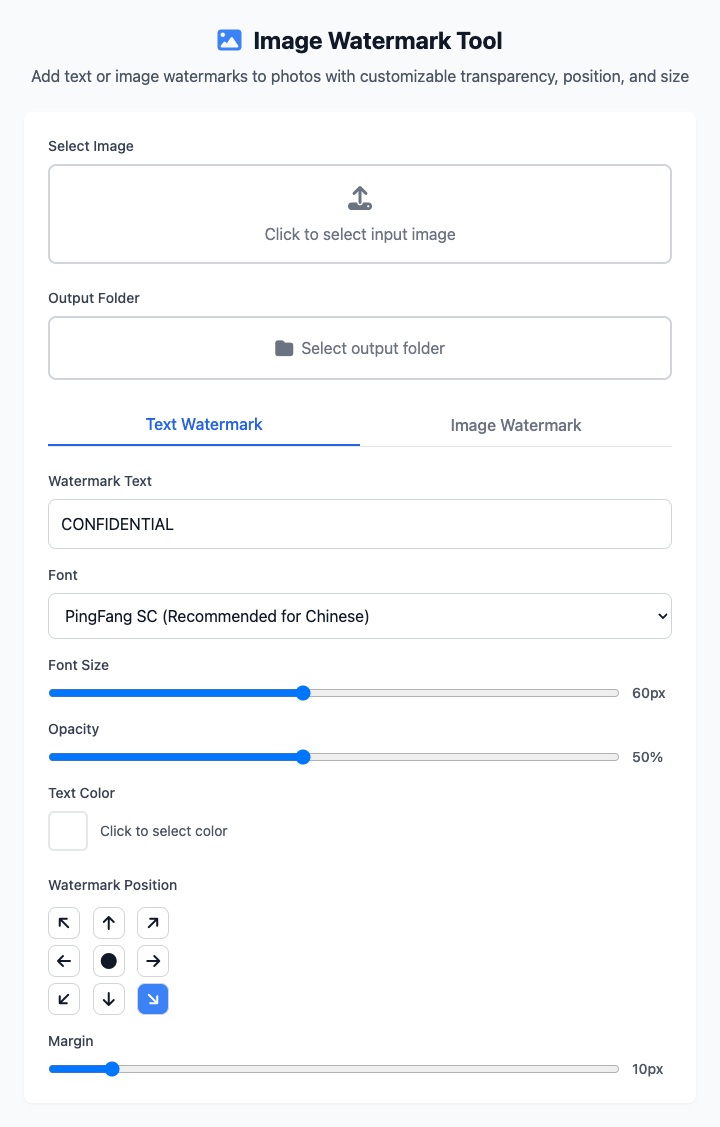
⚡️ Quick Start
- Select Input Images: Click to select one or more images that need watermarks added.
- Select Output Folder: Specify where processed images will be saved.
- Set Watermark:
- Keep the default "Text Watermark" type.
- Enter
(c) Your Namein the "Watermark Text" box. - Adjust text size and color.
- Choose Position: Click bottom-right in the nine-grid to place the watermark at the bottom-right of the image.
- Click the "Execute" Button: After the command completes, you'll get images with watermarks added.
🤔 When Should I Use It?
- You're a photographer or designer who needs to add your name or logo to a batch of images before publishing to claim copyright.
- You want to add a semi-transparent "Confidential" or "Draft" text when sharing screenshots or photos.
- You need to uniformly add website address in the bottom-right corner for a series of company product images.
⚙️ Parameter Description
Select Images: Add source images that need processing. Supports selecting multiple at once.
Output Folder: All images with watermarks added will be saved in this folder.
Watermark Type:
- Text Watermark:
- Watermark Text: The text content to display.
- Font/Size/Color/Transparency: Control the style of text watermark.
- Image Watermark:
- Watermark Image: Select an image (like a logo) as the watermark.
- Watermark Size/Transparency: Control the size and opacity of image watermark.
- Text Watermark:
Watermark Position: Click on the nine-grid to set the watermark position in the image (such as top-left, center, bottom-right, etc.).
⚠️ Important Notes
- This command depends on
ImageMagick. You need to install it via Homebrew first:brew install imagemagick. - Images with watermarks added will be saved in the specified output directory with original filenames.
- This is a responsive interface, and all your settings will be reflected in real-time in the command area below.
Related Tools
In the CmdWise app market, you can also find other image processing tools:
- Sips Image Batch Processor: You might need this to unify image format or size before or after adding watermarks.
- cwebp Image Converter: Convert watermarked images to WebP format for website use.